How To: Integrate Azure Active Directory with Picturepark
In this tutorial, you learn how to integrate Content Platform with Microsoft Entra ID (formerly Azure Active Directory).
Integrating Content Platform with Azure AD provides you with the following benefits:
You can manage who has access to Content Platform in Microsoft Entra ID.
You can enable your users to be automatically signed in to Content Platform (single sign-on) with their Microsoft Entra ID accounts.
You can manage your accounts in one central location - the Azure portal.
For more information about app integration with Entra ID, see What is application access and single sign-on with Azure Active Directory. If you don't have an Azure subscription, create a free account before you begin.
This tutorial focuses on Entra ID. For Azure AD B2C, the configuration differs in several areas.
Azure AD B2C does not offer features to include group membership in a token issued for user flow. Custom Code is required for this. Search for “using groups in Azure AD B2C”.
Prerequisites
Before configuring the Entra ID integration with Content Platform, you need the following:
An Azure AD subscription. If you don't have an Azure AD environment, you can get a free account.
Content Platform single sign-on (SSO) enabled subscription
Scenario description
In this tutorial, you learn how to configure and test Entra ID single sign-on in a test environment.
Content Platform supports OpenID Connect authentication.
Note: As Microsoft regularly updates the Azure Portal interface, the example images below may not always exactly reflect the UI.
In the Azure Portal
Register Content Platform as an App
In the Azure portal, ensure that you have selected the correct directory. To change directories, select the icon on the upper right, as outlined in the example below.

Open Microsoft Entra ID.

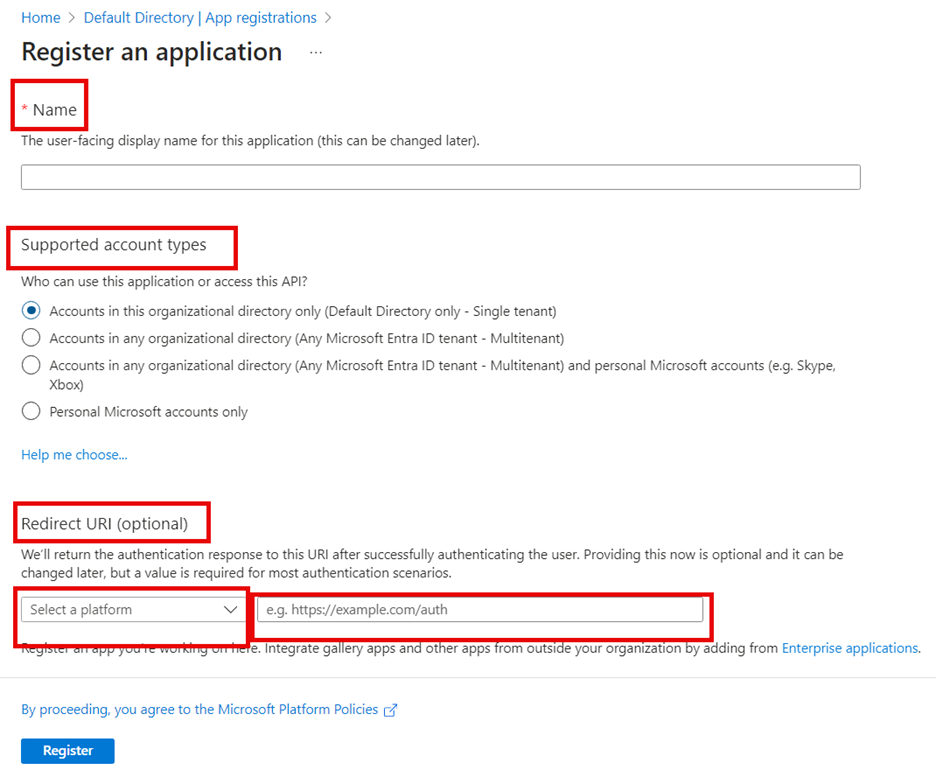
In the navigation panel, select App registrations and then select New registration to add a new registration.

Enter a name for the new app, for example, Content Platform SSO.
Select which account types should have access (single tenant only allows from the currently selected directory).
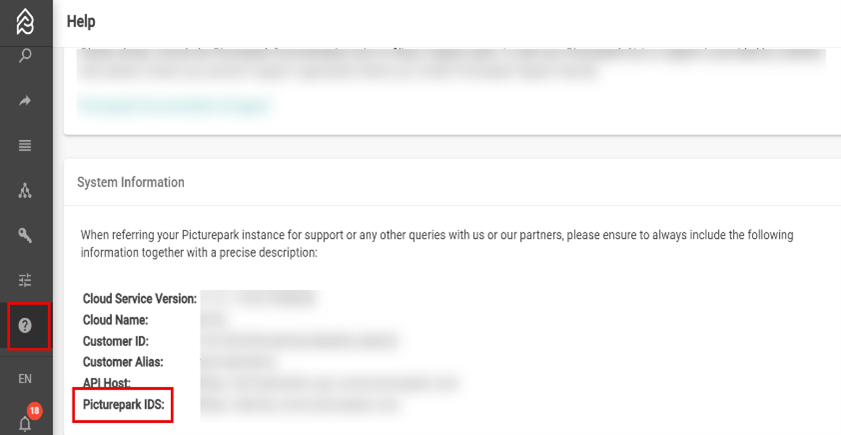
Redirect URI refers to the URL of the identity server for your Content Platform tenant. To get the IDS, sign in to your Content Platform tenant, go to Help > System Information, and copy the Picturepark IDS value.
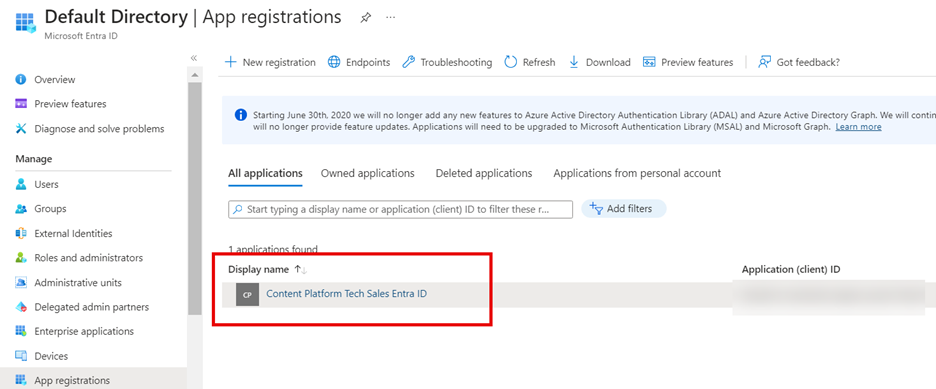
The newly registered app will open directly, and your breadcrumb will look similar to the following example:
Configuring the Content Platform app
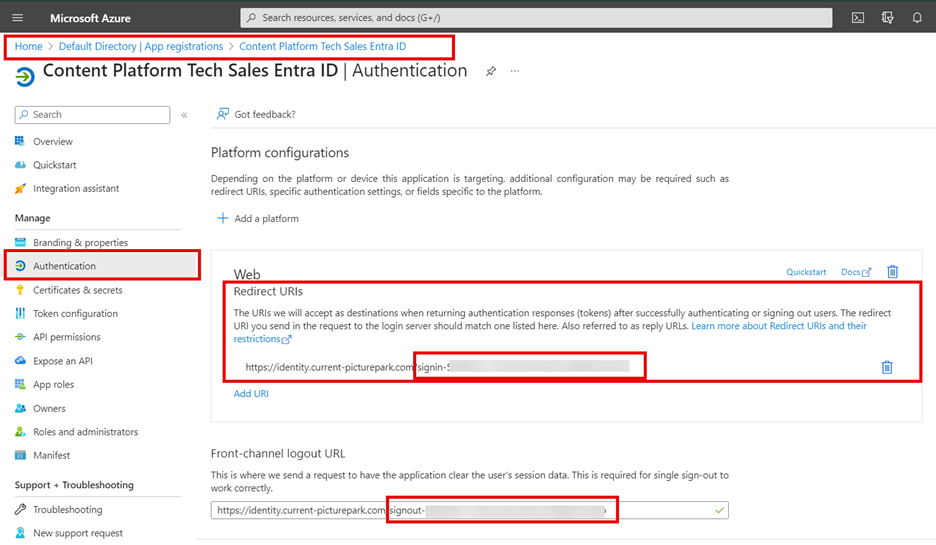
In the Azure Portal, open the app you created in the first part of this tutorial and select Manage > Authentication .
Under Redirect URIs add the ID value obtained in the step before behind the IDS URI provided in section 1. The path contains three parts: the “Picturepark IDS https://ids-cp-ch.picturepark.com“, a “signin-” component, and the ID value. For example: https://ids-cp-ch.picturepark.com signin-598b9251-d7d0-4a53-887e-6bdf2b16c35b
Add a Front-channel logout URL. Use the same values as in the previous step, but replace the signin- component with s-. This step is optional and not required for authentication to work. It is convenient if users are logging out of Entra ID as this will log them out of Content Platform IDS and, within a maximum of 10 minutes, log them out of Content Platform itself.
Implicit grant: Leave this empty. Content Platform Open ID Connect integration uses code flow, not implicit flow.
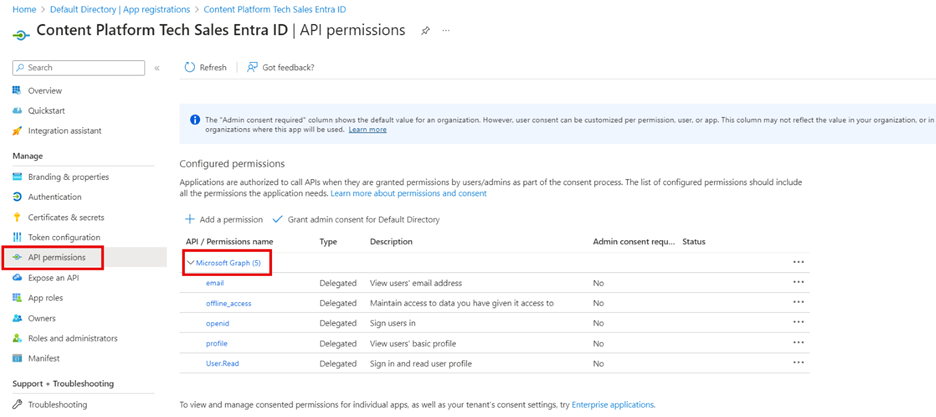
Add API Permissions
Add permission .
Select Microsoft Graph .
Select Delegated permissions .
Select and save.
email
offline_access
openid
profile
Add API Exposure to Client Application
Open Manage > Expose an App.
Add a scope.
You need to set an Application ID URI before you can add permission. (Microsoft chooses one by default, but it can be changed). Save and continue.
Scope name: user.signin
Who can consent? Admins only
Consent display names: User Authentication
Consent descriptions: User Authentication
Select Add scope.
Add a new client application.
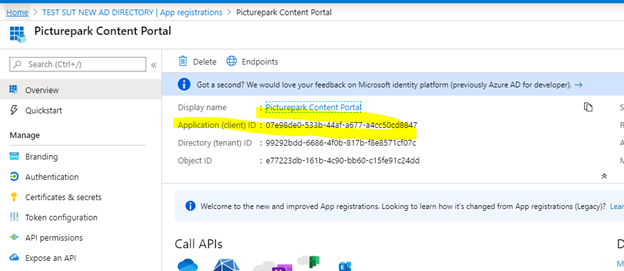
Client ID is taken from the Overview page.
Select Scopes.
Claiming Steps - Add Tokens to the Azure App
For information on token creation in Azure AD B2C, see https://docs.microsoft.com/bs-latn-ba/azure/active-directory-b2c/configure-tokens
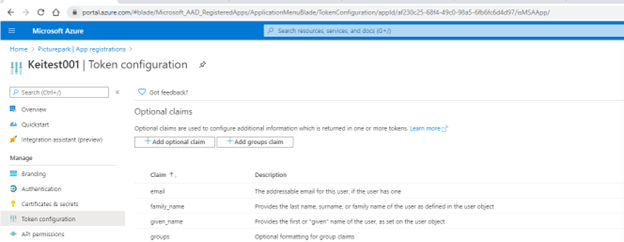
Go to Manage > Token Configuration.
Add optional claims.
You need to pass the email address claim to Picturepark as it is required.
We also recommend the family name and given name. These three do not need to be mapped in Picturepark as they are automatically added. Other claims will also need to be mapped in Picturepark under Settings/IdP Settings/YourIdp/Group Mapping
Add any group claims in Azure and then map them into Picturepark. The group claim type in Picturepark IdP settings is groups, and the group name is the object ID of the group.

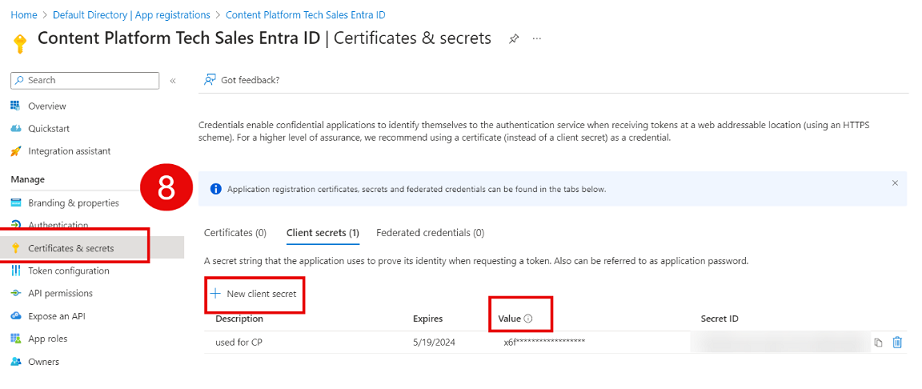
Go to Manage Certificates & Secrets, create a new client secret, and copy it.
Add the client ID into the Picturepark IDS and the openid connect metadata document url to the urls and client secret to client secrets and save.
We recommend setting a calendar entry to recreate and then reshare the secret value with Fotoware so there is no downtime due to expired client secret value.
Limitations
You cannot add the Picturepark Content Platform from the gallery. If you try, you will find only Picturepark DAM.
In Content Platform
Before you proceed to the next step (configure the newly created App in Azure), you must set up an Identity Provider in Content Platform.
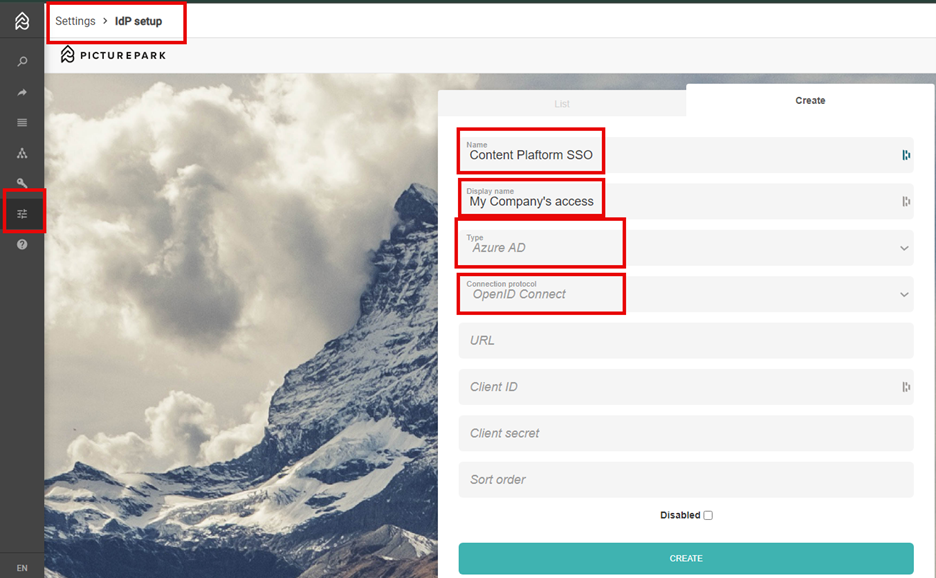
In your Content Platform tenant, go to Settings > IdP setup.
Name: Choose a name for your internal use.
Display name: the name shown to your users on login, for example, Company Access.
Select Azure AD from the dropdown list.
Protocol: Choose Open ID Connect .
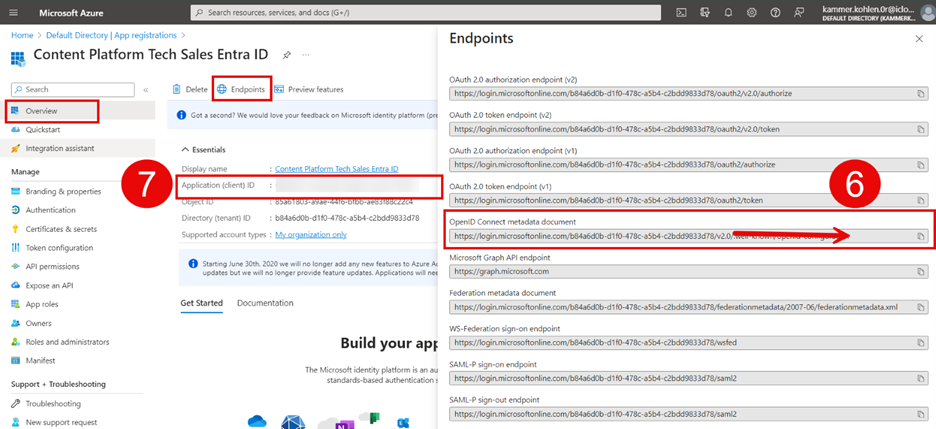
URL: In Azure Entra ID, open the app you created in part 1 of this tutorial. Go to Overview > Endpoints, copy the value from Open ID Connect metadata document (make sure to remove everything after v2.0), and paste it into the URL field.
Client ID: retrieve the value under Application (client) ID and copy it into the Client ID field.
Client Secret: go to Manage > Certificates & secrets > Create new secret. Retrieve the Value and copy it into the Client Secret field.
Sort order: This field does not need to be filled out; it will be created automatically. However, if you have multiple IdPs and want to display them in a certain order, you can add a number here, e.g., 0, 1, 2, 3, etc.
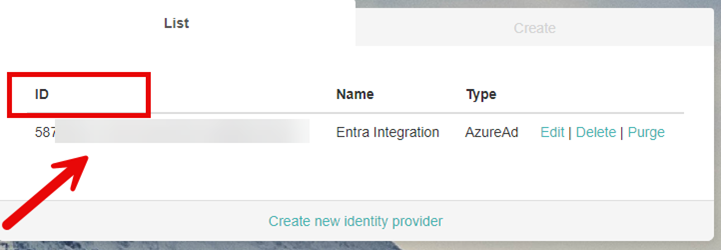
Select Create and copy the ID value. You need this to complete the configuration of your app in the Azure Portal.
Assign Groups and Users - optional
In Entra ID, go to Enterprise applications. Select the app you registered. assign users and groups, select your users/groups, and assign them their respective roles.
Congratulations. you are all set up! To test your configuration, open Content Platform in a private window.
